Triggering Mixer/Plugin Snapshots using Markers in Reaper

Long time no see...

Hi again, been a long time since i've written a Blog post and a lot of things have happened. I'm know working at Rebellion as a Junior Audio Designer which is pretty sweet. Part of this change however meant making the leap between DAWs from Pro Tools to Reaper, which I've totally fallen in love with and wish i had switched sooner, it's phenomenal. As part of my transition i've had to work out ways to replicate my old workflow. Here's how I have managed to use Snapshots in Reaper and have them triggered through the Markers of the timeline, allowing for easy mixing of multiple sounds of the same type that perhaps share the same effects chains or elements, but have slight mix tweaks from each one.

A few people in the Gameaudio Slack group were interested in this, so I decided to do a quick writeup.

1.) Setting up Snapshots

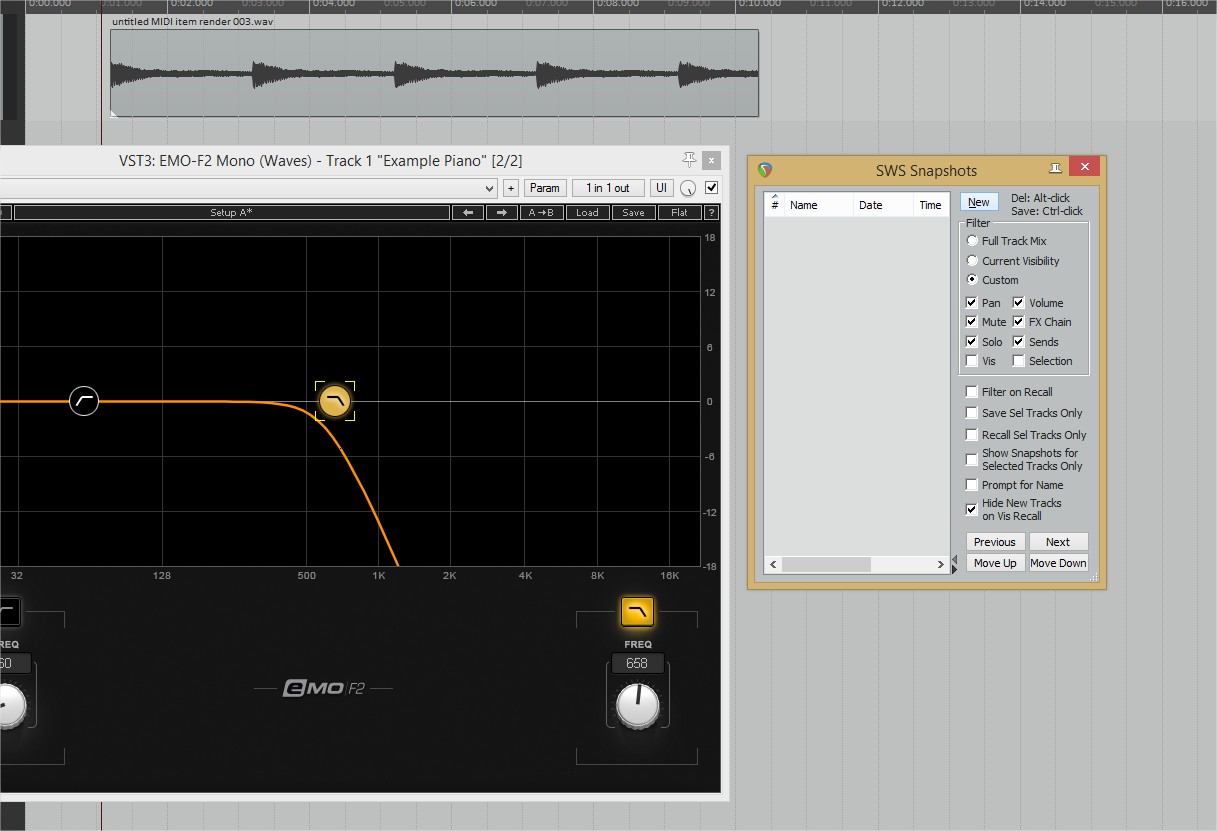
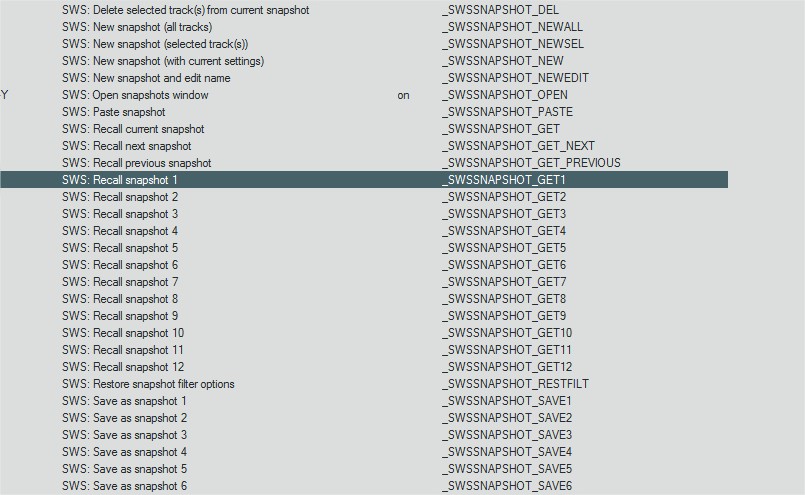
So first thing you're going to need to do is install SWS extensions   which I would strongly recommend every Reaper user does as it gives countless extra actions that I find useful every day. One of these includes that snapshot automation feature. You can pull up the window for this by finding "Open Snapshots Window" in your actions menu.

Once you do that you'll be presented with the following window;

From here, simply make your first mix, and then hit the New button. Before doing this you can also decide how much or how little information is going to be stored by using the tick boxes below the New button. With your first mix snapshot saved you can make any alterations safe in the knowledge that the original mix can be recalled at a moments notice.

From here you can make as many mixes as you need, saving each one sequentially.

Mix 1

Mix 2

Mix 2

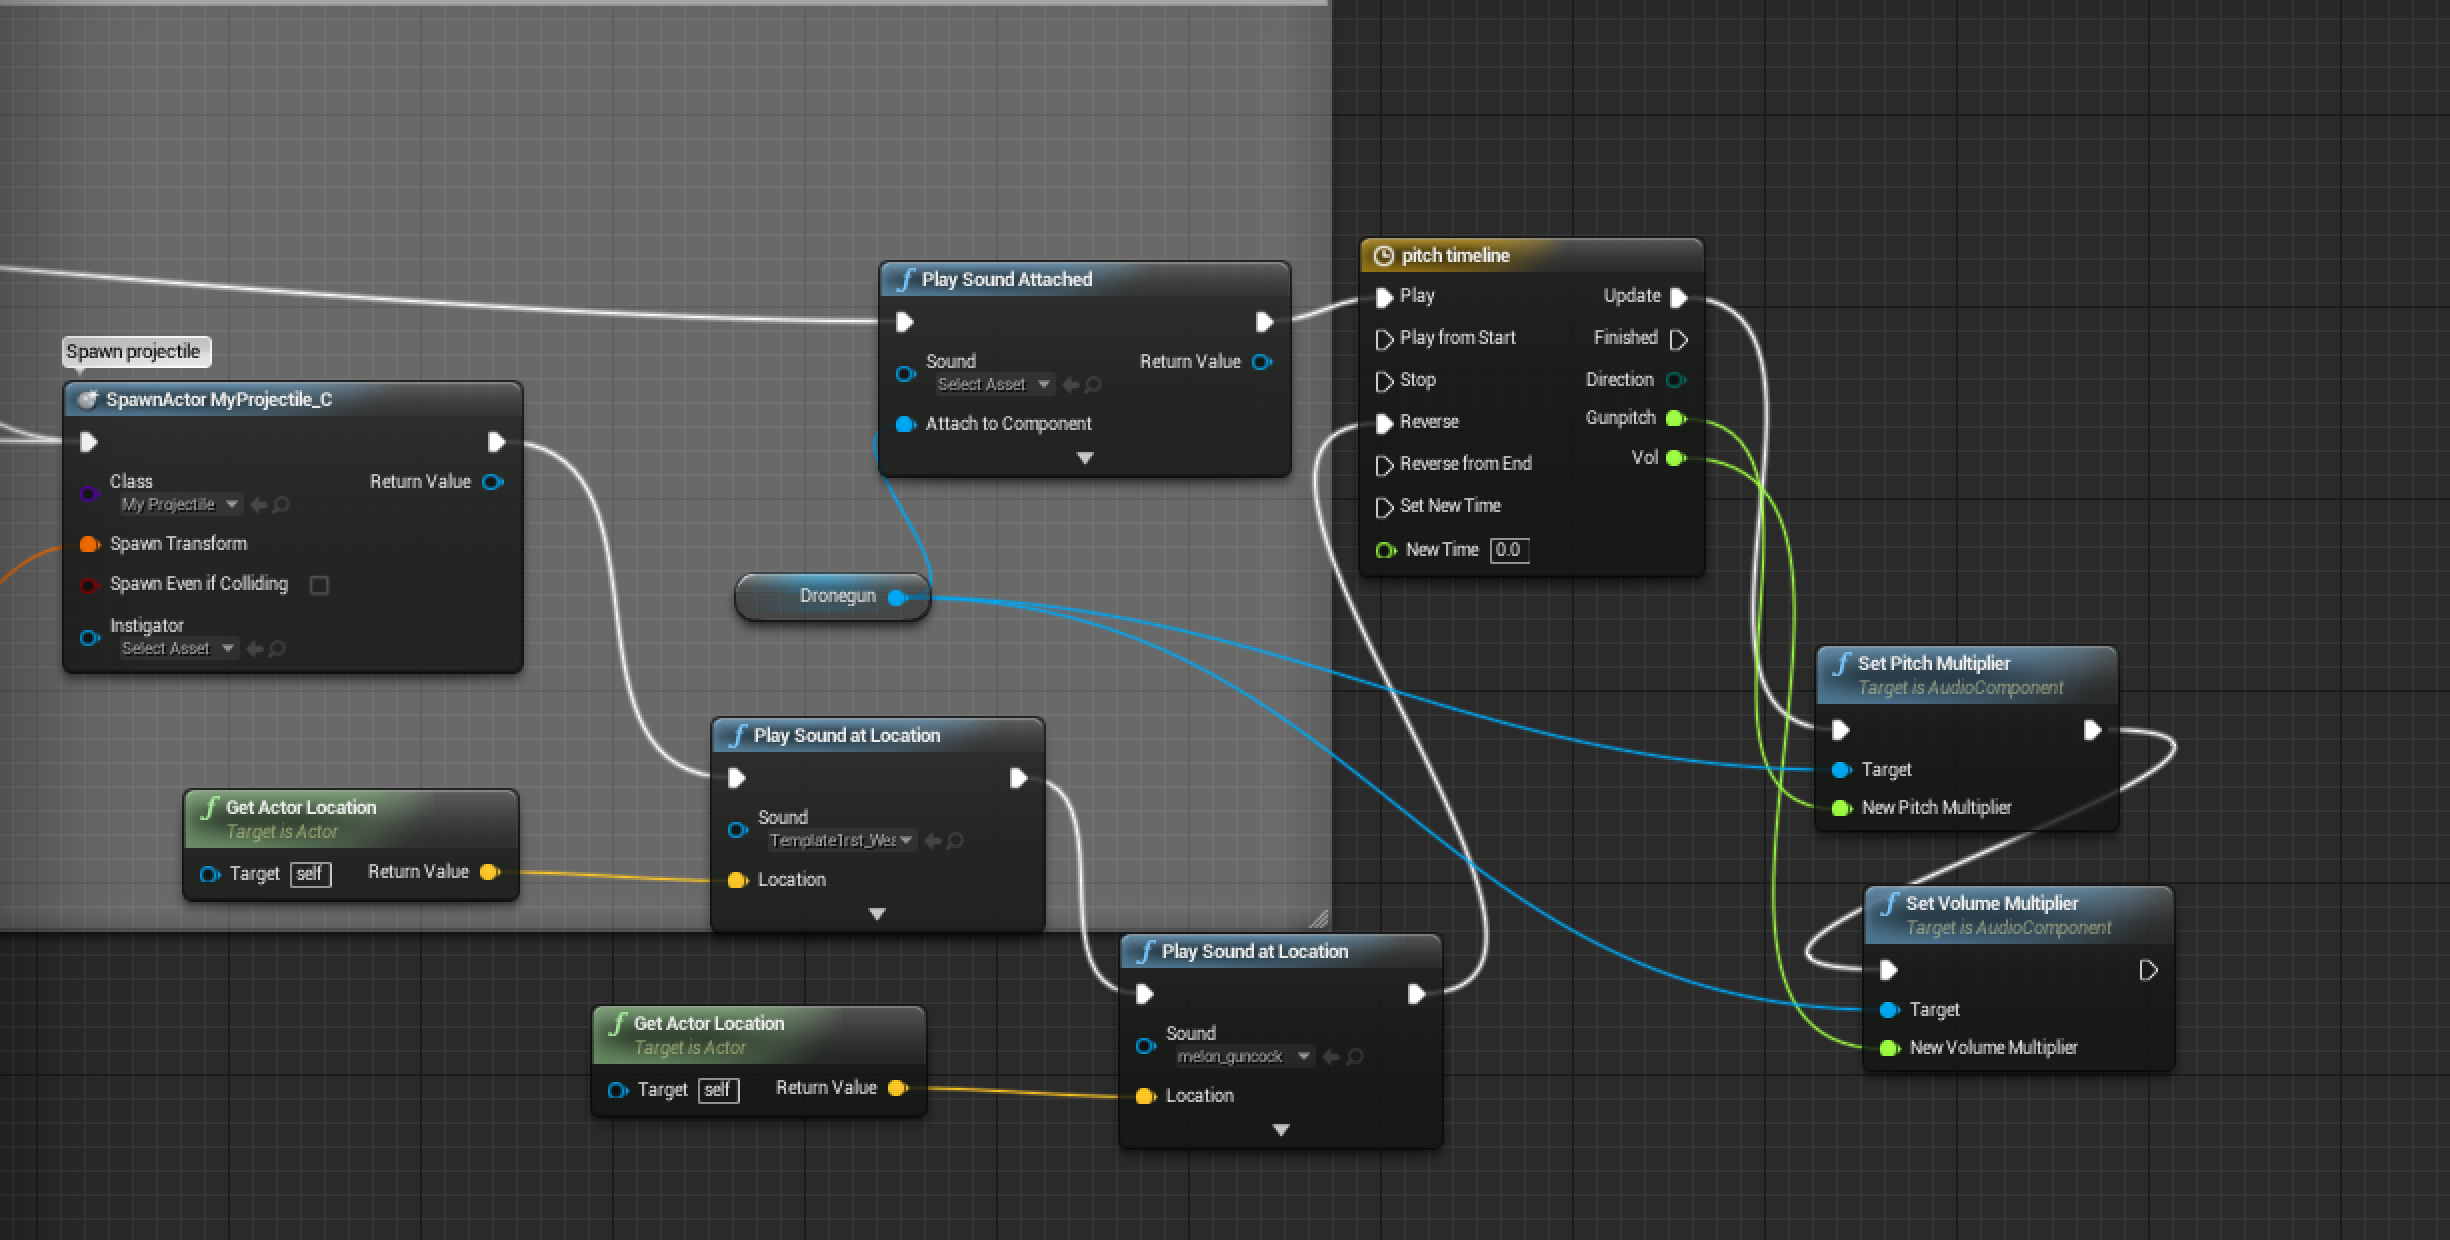
This in itself is incredibly useful to A/B ideas as well as keep mixes for several different sounds in one project...but what if we could Automate their recall?

2.) Recalling Snapshots using Markers

Markers are a fairly standard feature of Reaper, but in case you've not come across them they simply place a mark on the timeline that is easy to see as well as jump to. They are also secretly very powerful as you can make any action be triggered from a marker by placing name of that command in the name of the marker.

So the first thing to do would be get the Command ID for the action we want to do, in our case that would be the action that recalls Snapshot 1, it's reference being "_SWSSNAPSHOT_GET1". You can find these on every single action in the action list.

Now we simply double click our marker and paste that Command ID into the name of it, putting a "!" symbol at the start of it.

Now whenever the playhead passes the marker in the timeline the snapshot assigned to it will load in automatically.

Thanks for read and I hope that helped! Feel free to comment or get in touch if you have any questions or just want to talk Game Audio.

Haroon


UPDATE: One thing I forgot to mention in this is that this method currently DOES NOT work for standard offline renders. Hopefully this will get fixed soon!

My Game Audio Adventure - Part 3

Hello again, for part 3, I'll continue where i left off, by talking about the next room in my implementation. In case you haven't read part two, a video and playable build of what i'm about to discuss can be found over at my Portfolio page.

The Radio

For this room i placed a radio in a wooden room that upon approach is emitting static, but can be tuned four different stations.

To set up the tuning i made it so pressing the J and K keys tuned the frequency up and down values between 0 and 100 by  making them activate a timeline that linearly went up between those values. This float was then fed into a RTPC value which controlled what happened as you scrolled through the Freq.

Frequency Tuning Blueprint.

From here the RTPC data went to a blend container which featured random containers of static noise as well as music for stations ( a big thank you to Katie Tarrant for letting me use some of her compositions). These crossfaded in and out of the static in order to recreate tuning in and out of a radio station.

Wwise Radio Blend container

I also included a sine wave that modulated rapidly and erratically in pitch to emulate the sound of  the frequency band that you can sometimes hear on old radios. It was also in volume whenever a song would be present. When combined all together i feel this gave a pretty good radio for players to tune.

Synth modulation

Haunted Room

For the final room in my level i decided to create a way to have audio radio generate around the player in order to make them a little unsettled. For this i decided to use a creepy treated voice whispering. After recording several whispered phrases i used Waves' Doubler and SoundToys' Crystallizer plugins in order to manipulate the sound into something otherworldly and sinister, yet indecipherable.

Part of the signal chain for the voice.

With the sounds created it was now time to create the way they would spawn and generate around the player. I did this using the following in the Level Blueprint;

Spooky right?

This worked by  taking the players location and  adding random stream value between 500 and -500 to the X and Y values  which created an area around the player which sounds could be played at. These were triggered at random times between 2 and 5 seconds to increase the unpredictability. These all triggered a Sound Cue that randomly selected a different voice snippet each time it was called upon. This effect was particularly effective on headphones where the localisation of the sounds in UE4  can sound behind and above the player.

Guns Guns Guns.

At the end of my level is a door that requires a big button press to open. Once inside you'll find a little shooting range. At the end of this are 3 target blocks made of Metal, Glass and Wood. These emit sounds when hit with bullet impacts which were triggered off using the following basic Blueprint.

Pretty basic, yet effective.

For the Gun selection i decided to include 3 different models;

  • A Rifle
  • A Charging Grenade Launcher
  • A Machine Gun

Rifle

For the Rifle i used a Wwise sequence container that contained 3 Random Containers that each held different parts of a gunshot. One for the Transient, Body and Tails. Then the sequence container quickly cycled through all 3  with a rapid crossfade to create a varied gunshot sound.

Sequence Container for the Rifle.

Grenade Launcher

For this is used timelines and sound containers in UE4s audio engine. A looping drone is playing constantly at a low volume and upon holding down the firing button the timeline is triggered and ramps up the pitch and volume over a 2 second period until it holds a tone. Then upon release a firing sound is triggered and a grenade is fired which explodes a few moments later. Then the pitch and volume of the drone is reversed down to simulate a charge down.This was all achieved using the following Blueprint;

The Blueprint

The Timeline

Machine Gun

This was achieved using Wwise switch containers and RTPC as well as UE4 timelines. The Blueprint looks like this:

The Machine Gun Blueprint

Holding the fire button triggered a custom event that after allowing 2 seconds for a charge up, triggered a function every 0.1 seconds that fired a bullet. That function contained the following:

The Machine Gun Fire Function.

In here a Wwise event was posted every time that played the Machine Gun Container. Also the ammunition counter reduced by 1. This was used to trigger the Wwise switch using RTPC data so that when the ammo hit 0 the bullet sound would stop firing and a dry click would trigger instead.

The Wwise Switch

Also featured during this is a charge up that simulates the motor of a machine gun kicking in. this was done using a UE4 timeline to push out an increasing float value over 2 seconds and have that tied to the pitch of a charge up container via RTPC, which featured a looping mechanical sound. This was also reversed upon release to simulate the motor winding down.

The Timeline for the Charge up.

The Charge up of Volume and Pitch in Wwise

And that Ladies and Gentlemen marks the end of my Game Audio adventure, the first chapter at least. From here i intend to grow and develop this Interactive Demo Reel, by adding and refining elements as my skills in Game Audio develop. If you've read all of these thank you very much and i hope they were interesting.

Next I'll blog about my linear post production work, but maybe after some deadlines at uni pass.

Thanks once again!

Haroon

My Game Audio Adventure - Part 2

Hey there... well this post is well overdue but chaos that is the final year of a degree caught up with me and i ended up being wrapped in all the work i had to do rather than blogging about it. Guess that makes me a terrible millennial.

So to bring everything up to speed, my Game Audio implementation is done, which is a huge relief. you can go check a video of it over on my Portfolio page and even download a playable build of it. This post intends on describing some of the processes behind it and how i developed the implementation.

First up would be the room. I ended up cutting some content from my initial plan such as the room full of sound triggering buttons and the waterfall, mostly due to time constraints. However i will be looking to revisit these soon particularly the waterfall which i hope to achieve using Pure Data and Enzien's Heavy to bring it into Wwise. But anyway the room ended up looking like this :

An overhead view of the level.

As you can see i managed to build a central corridor connecting several different areas, many of which had a unique audio feature in them. Key to this were the different surface types, which triggered different footstep samples. These were;

  • Grass
  • Gravel
  • Metal
  • Concrete
  • Swamp
  • Wooden Floor
  • Tiles

Footsteps

My footstep system was done using Unreal Engine 4's audio system and relied on physical surface data being used to inform which samples needed to be triggered. The first step in this was to give each texture a physical material assignment, which in turn had a surface assigned to it.

A physical material being applied to the Tile Mesh.

After this anim notifys were placed in the first person run animation in order to  trigger when a footstep should be played. this was tricky to sync up because...well the model nothing more than a floating torso and arms, however with a bit of tweaking it was possible.

Animation notifys in line with each step of the animation cycle

These were then later referenced in the character blueprint where they triggered off a system that looked at which material the player is currently on and therefore which sound to play.

The system that triggered the footsteps

It looked at when was below the player using a line trace and then got the surface type result from that using the "Get Surface Type" node. This node then fed a switch that contained  the different physical surface that were present in the level. From here corresponding Sound Cues could be assigned , which allowed for the different steps to be triggered.

With the Sound Cues themselves, a series of footstep samples were fed into a random node and then into a modulator to select a sample at random and then pitch modulate it , giving a wide range of output. This can be seen below.

An example of a footstep cue.

Grass Room

So when you start up the level on of the first rooms you'll come across is the Grass room. This is meant to mimic a wide open, natural space such as a field. The footstep sounds for this were made using scrunched up VHS tape that had been sacrificed in the name of sound (it was Star Wars: Episode 1, so i could finally exact revenge on behalf of geeks everywhere by stamping on its guts).

At the end of this level  i decided to place some trees which had bird some emitting from them. The first thing i did was place a Wwise Ambient sound Actor into UE4 and assign a distance attenuation profile to the Bird song container which handily appeared in real time in the editor.

The rather large Wwise attenuation sphere.

Though completely spilling into the other environments, the walls occluded the sound which ensured it remained contained in the room.

Meanwhile in Wwise i had two nested random containers in a single blend container. These  consisted of two types of bird song. One of these were long drawn out snippets of song and the other contained short bursts of song. These randomly blended and crossfaded in with each other using a randomiser on the Transitions duration which helped generate a diverse and ever changing bird song.

The Containers that crossfaded the bird song

The Bees

Yes. The Bees. So in my swamp room there is a tree that contains a swarm of angry invisible bees, which is the most terrifying thing imaginable next to invisible Spiders or Bears. These Bees get more aggressive the closer you get to the tree, which was achieved by first measuring the distance between the player and the tree and then feeding that float into an RTPC input in Wwise like so;

The Blueprint to get the distance from the Hive.

ensuring that the Bees only sounded off when inside the right room a simple IF branch filtered out any distance too large.  This RTPC data was then used to mix a blend container containing 3 different Bee sounds depending on how close you get to the Tree.

Bee Crossfades

Swimming Pool

No Game Audio party is complete without a pool. So i made one, which was some feat of design using my limited 3D modelling skills. But you're more interested in how it sounds.

Pretty slick right?


If you've ever been in water or spoken to anyone who has, you may know about the fact that water doesn't like letting treble through and jumping in will attenuate any HF energy around you. So in order to recreate this i used UE4's sound mix feature to "push" a mix onto the master output  when in the water, this mix took the simple 3 band EQ and cut a large part of the high end. The sensation of being underwater was further emphasised with bubbling sounds fading in as well as splash sounds for rising in and out of the water. this was all done using a few simple nodes in the level blueprint. This is all demonstrated by having some thumping electronic music to swim around in at your leisure.

The Blueprint system used to push the sound mix


Well that's all for now, i'll post more tomorrow and go into detail about the Spooky haunted room, the mechanical door and the guns! if you just can't wait til then you can go check out video or download the level yourself over at my Portfolio page.

Thanks for reading and i hope you join me in part 3 of my Game Audio Adventure.

Haroon.

Linear Post Production - The Last Of Us : PART 2

So this is the second blog on how i've replaced the sound for Naughty Dog's The Last of Us.

A few things i forgot to mention in my last blog were the UI (User Interface) and Atmos sounds were created.

For the UI sounds I used a hybrid approach of software synthesis and hardware based processing. A majority of the tones were generated using Simple blended oscillators from Native Instrument's Massive :

massive

These signals were then fed out through an interface and into an Eventide Eclipse unit for harmonic processing, then chained into a Yamaha SPX-990 and then a Bricasti M7 to add space and depth using reverbs. Overall i tried to go for subdued menu tones in order to fit with the general aesthetic of the game and not make it too jarring when transitioning between menus and gameplay.

Other tones were generated by pitching organic sounds such as a wood block and then feeding that signal into Guitar Rig's emulation of the old Electro Harmonix guitar Synth pedals. These were notoriously bad for their tracking and gave a very odd filter sweep to the sound, one that suited the menu tone well.

Grig

Another use of an organic sound was the use of a finger cymbal sample from Battery that was then fed into Logic's Tape Delay emulation, dialed in a short delay with high feedback and heavy modulation in order to accentuate a warbling effect as the sound decayed. It was very important with this not to trigger the delay into self-oscillation so finding the balance was important.

chime

The Atmos however needed a little more work. For this i needed the sound of tweeting birds so i ventured off to the local park at the crack of dawn to go find some. Armed only with my brand new Sony PCM-M10 handheld recorder and my trusty Røde NT4 (with dead kitten) i stalked the birds on a freezing morning for about an hour and collection the sounds i needed, after cleaning up all the road noise using Isotope's amazing RX4 (seriously, what is this wizardry?) i had some pretty sounding birds to layer in.

So Cold.

So Cold.

Footsteps

For my footstep system i took heavy influence from Game Audio, rather than traditional linear film methods. In particular Wwise's method of randomised containers and switches to change footstep sounds based on surface or stance states really appealed to me. One of the biggest differences between Games and Film when it comes to movement sounds, is that in an Action game the player is very rarely stands still for an extended period of time. This was very true of the footage i had captured which featured constant movement for the whole duration and movement that would be deemed erratic at best if done in real life.

My solution to this was the use randomised samplers and MIDI program changes in order to trigger a wide variety of sounds in a simple and elegant manner. The first step in this was the map out all of the footsteps using MIDI notes. i did this using my Akai MPD to "play along" to the footsteps, which gradually got easier as i learnt the rhythms of each state (running, walking, crouching etc) animation cycle. Once these were in Sync it came to the actual implementation.

First up i had to chop all the footstep audio i had recorded into individual hits, making sure the edit was made at the transient and decayed nicely to avoid any glitches :

footcut

Then these were indivudally labelled and exported out of Pro Tools as clips. From here they were imported into Native Instrument's Battery 3 where they were all set to be triggered by the same note and randomly selected each time. This resulted in a different random footstep each time a note was triggered. This replicated Wwise's randomised container.

From here i took advantage of the fact that Native Instrument's Kontakt can do 2 really cool things.

  1. It can load multiple instruments into one unit that can be changed using midi program messages
  2. It can Battery files as self contained instruments.

So from here it was simply a case of loading all my Battery racks into Kontakt 5 and using midi program numbers to switch to the correct bank when needed (i.e when moving from water to concrete), this drew influence from Wwise's Switch system. It looks something like this:

Although the setup took a while, the end result gave me a robust and easy to use system, heavily borrowing from existing Game Audio methods, making syncing this linear game footage a lot easier.

The first lot of footage from this clip will be up in a few days, so hopefully this will start to make more sense. Until then, thanks for reading!

Haroon.

Linear Post Production - The Last of Us

So the other half of my final project is to do complete sound replacement for a linear piece of footage, essentially stripping it of all audio and rebuilding it using my own; Foley, ADR, Score and Built sounds in order to showcase skills in Sound Design and mixing.

For this project one of the clips i have chosen is gameplay footage captured from my PS4 of last year's The Last of Us:Remastered, which i found truly inspirational with its implementation of Sound Design, not just at a technical and aesthetic level, but also in the way sound is absolutely integral to the game mechanics. For those who haven't yet played it the main enemy in the game, a kind of disfigured zombie don't detect you on sight, instead they operate on sound, which forces the players to think carefully and tactically about how much noise their movements make through the levels, to avoid detection.

In this blog i've decided to focus on the Foley recording aspect of my project, capturing or synthesising all of the sounds in order to create an audio mix that is truly my own.

Though I didn't initially expect , i quite quickly found a real dissonance in approach when producing audio for linear game footage in a way more traditionally used for film. With Games being a non-linear medium all audio gets triggered for an appropriate context, resulting in rather granular audio chunks being quickly combined and mixed on the fly. With the fixed linear context of film it's far more appropriate to record fixed passes of audio, particularly with Foley and footsteps as they will always fit that situation.

What i found when analysing the original audio is how, particularly during hectic moments , the audio engine was simply triggering all the sounds for every event on screen, which would be a very difficult task to recreate using Foley artists, as they simply would be unable to do that many actions at once. Even with layers of foley passes it would be very easy for the mix to get cluttered.

What i chose to do instead was take inspiration from the way a game audio mix is constructed and aim to create everything in a granular way. The first step in this was mapping out all of the sounds i needed to record, which took a lot of patience and SPREADSHEETS

It goes on and on...

So, using this method i mapped out all the UI sounds, Item Noises, Footsteps, ADR, Music and Gunshots. it created a large unwiedly list, but at the same time it did create a good starting point to work from. Also by placing Timecode In and Out points, i saved a LOT of time that would be otherwise spent hunting for the perfect place for a clip.

The granular approach meant that a lot of these sounds were not recorded to the footage, but instead done freely and edited in time. This enabled a good lot of Sound Designing to be done on the fly, for example having several heavy impact sounds and several sweeteners meant that the individually spliced clips could be swapped in and out in different combinations quickly, until the right one was found. It also meant that i now have clean edited library of sounds that can be used in future projects if needed.

Foleyprops

This approach continued into areas traditionally done in long takes such as Footsteps. Due to the the fact that Joel is running for almost the entire clip and the erratic nature of his movement (perhaps a fault of my play-style when capturing) it would have been very difficult to replicate this live. So instead i took further inspiration from the implementation techniques of Game Audio and decided to record a range of footstep surfaces and speeds (running, walking, sneaking) in large continuous takes (around 2-3 minutes).

Santa came early

Santa came early

I couldn't feel my legs for around 30 mins afterwards

I couldn't feel my legs for around 30 mins afterwards

These were cornflakes once

These were cornflakes once

These were later mixed down and processed and then split into individual footsteps, for placement in a randomised triggering system (more on that in my next post).

adrjoel

Lastly I recorded the ADR, this was a fairly straightforward process, typical of traditional methods, however i needed to record many injury and impact noises for the combat sections. I felt if i had an individual voice actor in on their own it would be rather disconnected for them and result in an inferior performance, instead i did this:

circle of shouts

By arranging the actors in a circle i enabled them to all work off each other and really get immersed in the scenario, resulting in some really great sounding injury and pain.

And on that weird final sentence i'm out, come back for part 2!


My Game Audio Adventure - Part 1

Hi

So to begin my blog properly i have decided to first talk about my journey over the past 6 months into games development and audio implementation. But first a confession, before last Summer i was a Game Development Virgin, never created anything using these tools in my life, so rather than go outside and enjoy one of the hottest summers on record, i decided to take advantage of the cost of Audiokinetic's WWise (it's free) and the new affordability of Epic's Unreal Engine 4 (about half the cost of a student night out) and well...lose that virginity. That felt awkward to type.

So first up i got familiar with Wwise, utilising their very handy Youtube tutorials and the LIMBO demo project to get to grips with the various switches, mixers and containers that are the backbone of the middleware.

LimboWwise

After this i decided to move on up and tackle the big challenge, a fully established development tool. After some research and advice from those already in the field, i settled on Unreal Engine 4, which is a fairly new engine, meaning there aren't as many tutorials and guides to using it, especially when compared to the ubiquitous UDK tool. However again, through the Youtube tutorials and official documentation i got to grips with its operation, in particular the new Blueprint system, which meant i didn't need to learn C++ , which was a huge plus (sorry for that pun).

From here i devised the basic outline for a large chunk of my Final Portfolio for my final year of my Sound Technology degree at LIPA. The idea is to devise an interactive playable Game Audio implementation demo, which demonstrates my skills in Sound Design as well as incorporating those Assets in game. My "blueprint" for the level looked like this:

Level Blueprint

Though a little crude and primitive, it had all the elements i need. A start point, several information points and several areas each with unique sounds or creative implementations. I am currently building this as you can see here :

Levelbuilding

However on top of developing the physical space for this demo i have also been creating individual implementations in Blueprints for systems such as; a charging laser gun, reverb volumes, triggerable buttons, and more...
 

A good example to note here is the Droning gun, which features just one short audio clip for the main sound, this is looped and then has its pitch parameter increased over a 2 second period according to how long the button is pressed, imitating a sci-fi laser gun. Upon firing this is reversed which gives a charging down effect. I feel this shows a good way to maximise sonic output from very little, in terms of actual recorded audio.

So that's part one of my Game Audio adventure! stay tuned for more updates i suppose. Where i will detail my integration of Wwise into this project, as well as how all these individual elements will combine into a final playable level.

That was a long one, thanks for reading!

Until next time

Haroon

Hello!

So, this is my first blog.

I'm using this to document my current work in progress during my final year of University, where the majority of my work is focused on developing a Portfolio.

It's split into 2 major sections

  1. An interactive Game Audio implementation, using Unreal Engine 4 and WWise, where the player can explore several rooms that each feature different Sound and Implementation techniques.
  2. Total Sound Replacement of linear footage, For this i have chosen footage from Naughty Dog's 2013 game The Last of Us, which is a title i admire deeply for its Sound Design. I have gone into this with the idea of recording, synthesising and processing every sound entirely myself where possible, a task which i have managed to achieve, (except for the score and things which are difficult to source such as Gunshots)

So for this reason i'm going to dedicate the next 2 blog posts into outlining my progress with each area of my portfolio, check them out!

Do i sign off here? Well i guess i am now

Haroon.